The secret to fast, lasting privacy isn’t choosing the fastest-growing hedge, but implementing a maintenance-aware strategy from day one.
- Aggressive growth often creates “maintenance debt”—future problems like bare bottoms, invasive roots, and constant trimming.
- Proper spacing and “architectural pruning” are more critical for a dense screen than the plant’s maximum growth rate.
Recommendation: Select a hedge based on its mature size and required upkeep, not just its year-one speed, to create a living fence that works for you, not against you.
The desire for a lush, green privacy screen is a common homeowner goal. You want to block out the neighbors, muffle street noise, and create a secluded backyard oasis—and you want it done yesterday. The internet is filled with lists of “fast-growing” evergreens promising to deliver a living wall in record time. Plants like the Leyland Cypress and Green Giant Arborvitae are touted as miracle solutions, capable of shooting up several feet per year.
However, the relentless focus on speed often hides a crucial truth: rapid growth can quickly become a liability. Many homeowners, lured by the promise of instant privacy, inadvertently plant a maintenance nightmare. These vigorous growers can become too large, develop thin, gappy bottoms, suffer from winter damage, or even have invasive tendencies. The hedge that was supposed to be a solution becomes a constant, time-consuming problem that requires aggressive shearing and troubleshooting.
This guide offers a different perspective. What if the key to a successful privacy hedge wasn’t simply picking the fastest plant, but rather understanding the strategic principles that create a dense, healthy, and manageable screen for the long term? The true path to sustainable privacy lies in avoiding the common pitfalls before you even put a shovel in the ground. It’s about a shift in mindset from “how fast can it grow?” to “how well will it perform over a decade?”
We will explore the essential strategies and decisions that lead to a thriving evergreen hedge. From the foundational pruning techniques that ensure foliage from top to bottom, to the critical spacing decisions that prevent future gaps, this article provides the insights you need to build a living fence that is both beautiful and sustainable.
Summary: A Strategic Guide to Selecting and Maintaining Your Privacy Hedge
- The “A-Shape” Pruning Rule: How to Keep Hedges Green at the Bottom?
- How Far Apart Should You Plant Arborvitae for a Solid Screen?
- Why Your Evergreens Turn Brown in Winter and How to Prevent It?
- Hedge vs. Fence: Which Offers Better Noise Reduction?
- Iron Deficiency: Why Your Hedges Are Yellowing and How to Fix It?
- Why Your Privacy Hedge Is See-Through at Eye Level?
- Bamboo vs. Trellis: Which Natural Screen Blocks Neighbors Faster?
- The $500 Front Door Makeover That Selling Agents Swear By
The “A-Shape” Pruning Rule: How to Keep Hedges Green at the Bottom?
One of the most common hedge frustrations is the “bare bottom” syndrome: a dense, green top with sparse, woody, and see-through lower branches. This isn’t a disease; it’s a predictable result of improper light exposure. When a hedge is trimmed into a perfect rectangle or, even worse, a V-shape (wider at the top), the upper foliage shades out the lower sections. Without sunlight, the bottom leaves die off and the branches cease producing new growth, creating permanent gaps right at eye level.
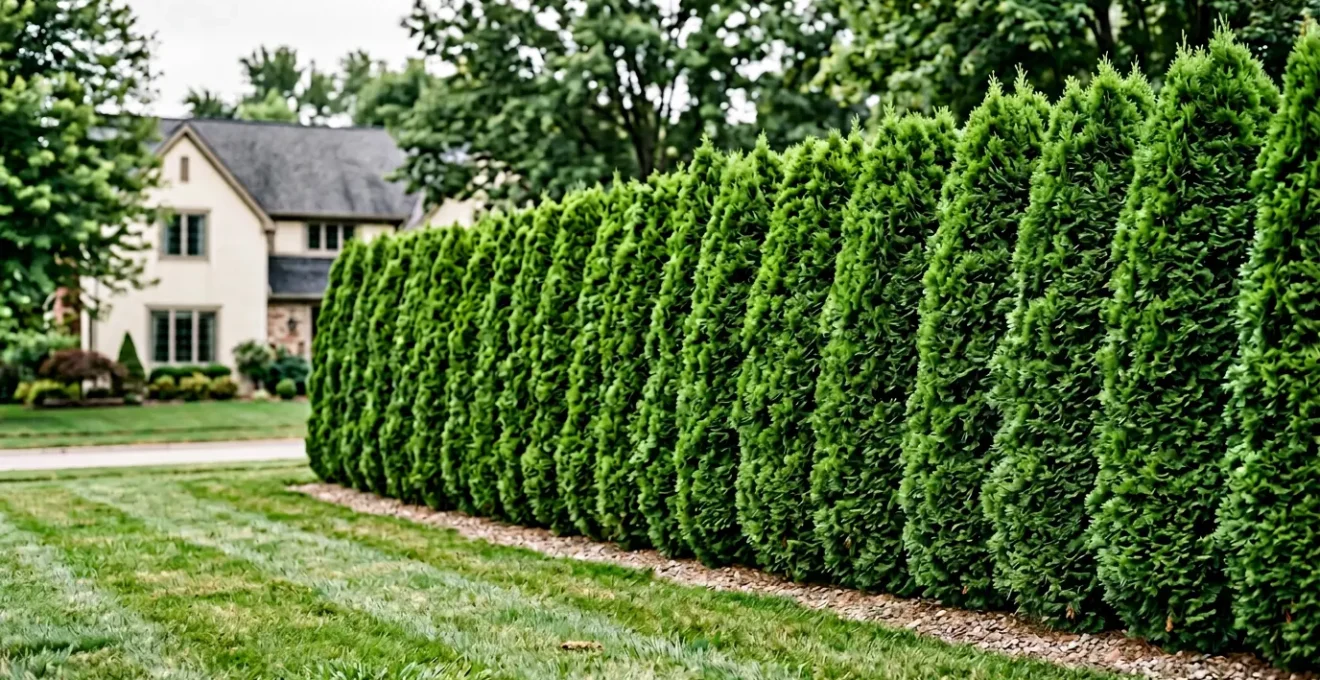
The solution is a foundational technique known as architectural pruning, specifically shaping the hedge into a slight “A” shape, where the base is always wider than the top. This subtle taper, even just a few inches, allows sunlight to reach every part of the plant, from its peak down to the soil line. This ensures the lower branches remain healthy, leafy, and dense, creating a solid visual barrier from the ground up.
As this image demonstrates, the angled shape is the key to long-term health and density. This principle should be established from the very first pruning and maintained throughout the hedge’s life. It’s a proactive strategy that prevents die-out, rather than a reactive fix. For formal, sheared hedges, this means angling your trimmers slightly with every pass. For informal hedges, it involves selectively removing upper branches that overhang the lower ones.
Action Plan: Maintaining Bottom Growth on Your Hedges
- Start Early: Prune hedges in early spring before new growth begins to establish the foundational A-shape taper.
- Prioritize Light: Ensure the base is always wider than the top to allow maximum sunlight penetration to lower branches.
- Thin, Don’t Just Shear: Use selective thinning cuts to open small channels for light and air circulation into the hedge’s interior.
- Know Your Species: Before performing hard renovation pruning on a neglected hedge, identify its tolerance. Yews can handle it, but arborvitae will not recover from cuts into old, non-leafy wood.
- Maintain the Form: If a formal look is desired, trim again after the first flush of new growth to reinforce the A-shape.
Ultimately, treating your hedge like a living sculpture that requires access to light at all levels is the difference between a thin, leggy screen and a dense, beautiful living wall.
How Far Apart Should You Plant Arborvitae for a Solid Screen?
A critical strategic error in the quest for a fast privacy screen is planting too close together. The logic seems sound: closer plants should fill in faster. In the short term, this is true. But in the long term, it creates intense competition for light, water, and nutrients, leading to a host of problems. Overcrowding is a primary cause of interior browning, increased susceptibility to disease, and weak growth. Eventually, the plants will thin each other out, creating the very gaps you sought to avoid.
The correct spacing depends entirely on the specific cultivar’s mature width and your desired outcome. Planting ‘Emerald Green’ Arborvitae (3-4 feet wide) at the same distance as ‘Green Giant’ (12-15 feet wide) would be a disaster. The goal is to space the plants so their branches will just touch once they reach maturity. This provides a dense screen without causing harmful competition. While it may look sparse for the first year or two, this patient approach prevents significant maintenance debt down the road. In fact, interior browning often occurs within 5 to 10 years specifically because arborvitae are planted too close together.
This comparative guide, based on data from expert planting recommendations, shows how spacing changes based on the plant and your goals. Opting for the “Dense Hedge” spacing will create a solid wall faster, but requires more attention to pruning and health.
| Arborvitae Cultivar | Mature Width | Spacing for Dense Hedge | Spacing for Natural Look | Time to Full Screen |
|---|---|---|---|---|
| Emerald Green | 3-4 feet | 3-4 feet apart | 4-5 feet apart | 3-5 years |
| Green Giant | 12-15 feet | 5-6 feet apart | 8-10 feet apart | 3-5 years |
| American Pillar | 3-4 feet | 3-4 feet apart | 4-5 feet apart | 4-6 years |
| Nigra (Dark Green) | 5-10 feet | 5 feet apart | 6-8 feet apart | 4-7 years |
Resist the temptation for an instant wall. By respecting the plant’s future size, you are investing in a healthier, denser, and ultimately more effective privacy screen.
Why Your Evergreens Turn Brown in Winter and How to Prevent It?
Winter can be a brutal season for evergreens. When homeowners see their lush green hedges turning brown and brittle, they often assume the plant has died from the cold. However, the most common culprit is not the temperature itself, but a phenomenon called “winter burn” or desiccation. This occurs when the plant loses more moisture through its leaves or needles than its frozen roots can absorb from the ground. Sunny, windy winter days are particularly harsh, as the sun triggers photosynthesis and water loss while the roots remain locked in icy soil.
Broadleaf evergreens like boxwood and holly, as well as thin-needled conifers, are especially vulnerable. The damage typically appears on the side of the plant most exposed to prevailing winds and afternoon sun (usually the south or southwest side). While some browning is normal and may recover in the spring, severe winter burn can kill entire branches or even the whole plant.
Prevention is a far more effective strategy than trying to cure a badly burned plant. The key is to ensure the plant enters winter fully hydrated and to provide a physical barrier against moisture loss. A few proactive steps in the autumn can make all the difference. Applying 3-4 inches of organic mulch around the base helps insulate the soil, retain moisture, and prevent deep freezing of the root ball. For highly sensitive or newly planted evergreens, installing burlap screens can block drying winds and harsh sun without trapping moisture against the foliage.
Furthermore, some professional treatments can offer an extra layer of defense. Anti-desiccant sprays create a waxy coating on foliage to reduce moisture loss. According to research cited by Rutgers Extension, these treatments can reduce a plant’s winter moisture loss by a significant 15-20%. This small investment can protect the much larger investment you’ve made in your privacy screen.
By addressing the root cause—water loss, not cold—you can help your evergreen hedge emerge from winter healthy, green, and ready for a new season of growth.
Hedge vs. Fence: Which Offers Better Noise Reduction?
When the goal is not just visual privacy but also acoustic peace, homeowners often weigh the merits of a hedge versus a solid fence. There’s a common and romantic belief that a thick, leafy hedge acts as a natural sound barrier, absorbing traffic and neighborhood noise. While hedges offer immense aesthetic and ecological benefits, their performance in sound reduction is widely overestimated when used alone.
The science of soundproofing is about mass and density. Sound waves are blocked most effectively by solid, heavy, and unbroken barriers. A typical wooden or vinyl privacy fence has a significant advantage here. It provides an immediate, solid wall that reflects and blocks sound waves far more effectively than a collection of leaves and branches. While a very mature, incredibly dense hedge (think 10+ feet thick) will have some effect, most residential hedges primarily scatter and diffuse sound rather than blocking it.
This scorecard, compiled from data on fence noise reduction, clarifies the trade-offs. It reveals that for pure acoustic performance, a fence is superior, but the best-of-both-worlds approach is a combination of the two.
| Factor | Solid Fence | Dense Hedge (6-8 ft) | Combination (Hedge + Fence) |
|---|---|---|---|
| Noise Reduction (dB) | 20-30 dB (STC rating 25-30) | Minimal (study shows almost no measurable reduction) | 25-30+ dB (optimal) |
| Time to Effectiveness | Immediate | 3-5+ years to maturity | Immediate (fence) + enhanced over time |
| 10-Year Total Cost | $3,000-$8,000 | $1,500-$4,000 (plants + maintenance) | $4,500-$12,000 |
| Annual Maintenance Hours | 2-5 hours | 15-30 hours (pruning, watering) | 17-35 hours |
| Aesthetic Value | Moderate (can feel constrictive) | High (natural, embracing) | Very High (layered depth) |
| Wildlife Support | Minimal | High (nesting, food) | High |
Planting a hedge in front of a solid fence provides the instant acoustic blocking of the fence while softening its appearance and adding the ecological benefits of a living screen. This layered strategy delivers the most effective noise reduction and the highest aesthetic value.
Iron Deficiency: Why Your Hedges Are Yellowing and How to Fix It?
When the vibrant green needles of your evergreen hedge start turning a sickly yellow, it’s a clear sign of distress. While many factors can cause discoloration, one of the most common culprits is a nutrient issue known as iron chlorosis. This isn’t necessarily a lack of iron in the soil, but rather the plant’s inability to absorb the iron that’s already there. The problem is one of chemistry, not quantity.
The key symptom of iron chlorosis is interveinal chlorosis: the foliage turns yellow, but the veins remain dark green. This pattern typically appears on the newest growth first. The underlying cause is almost always high soil pH. As documented by horticultural experts, when soil pH climbs above 7.0, iron becomes chemically unavailable to acid-loving plants like many evergreens. This “soil chemistry lockout” means that no matter how much iron is present, the plant’s roots cannot take it up.
Before you rush to add fertilizer, it’s crucial to correctly diagnose the problem, as other deficiencies can present similar symptoms. This diagnostic chart helps differentiate between common causes of yellowing leaves.
| Deficiency Type | Leaf Pattern | Affected Growth | Vein Color | Primary Cause |
|---|---|---|---|---|
| Iron Deficiency | Interveinal chlorosis (yellow between veins) | New growth (terminal leaves) | Dark green veins | High soil pH (above 7.0) locks iron |
| Nitrogen Deficiency | Uniform yellowing of entire leaf | Old growth (lower leaves first) | Yellow (same as leaf) | Nutrient depletion in soil |
| Magnesium Deficiency | V-shaped yellowing pattern | Old growth (lower leaves) | Green initially, then yellow | Soil imbalance or leaching |
| Manganese Deficiency | Broad green bands next to major veins | Older interior leaves | Wide green veins | High soil pH (similar to iron) |
Once you confirm iron chlorosis, the fix involves two approaches: a short-term treatment and a long-term soil amendment. For a quick green-up, apply a foliar spray containing chelated iron directly to the leaves. For a lasting solution, you must lower the soil’s pH. Applying soil acidifiers like elemental sulfur or using fertilizers formulated for acid-loving plants will, over time, make the existing iron available to your hedge again.
Why Your Privacy Hedge Is See-Through at Eye Level?
It’s a frustratingly common scenario: you’ve waited years for your privacy hedge to mature, only to find that while it’s tall, it’s disappointingly thin right where you need privacy the most—at eye level (roughly 4 to 6 feet). This happens for two main reasons. First, as discussed earlier, a lack of “A-shape” pruning can cause lower branches to die off. Second, some popular hedge species, like Leyland Cypress or even certain arborvitae, have a natural growth habit where they become more tree-like with age, “raising their canopy” and leaving a gappy, trunk-filled view at ground level.
Fighting the natural habit of a plant is a losing battle. The most effective and aesthetically pleasing solution is to stop trying to force the tall hedge to be dense at the bottom and instead adopt a strategy of privacy architecture. This means intentionally creating a layered landscape to fill the specific gaps.
This approach involves planting a second, shorter row of dense, robust shrubs in front of the main hedge. This creates a multi-layered, impenetrable screen that offers complete visual blockage and adds depth, texture, and interest to your landscape. Instead of a flat green wall, you get a sophisticated, designed look.
As the illustration shows, the shorter foreground plants completely obscure the leggier base of the taller hedge behind them. Good choices for this secondary layer include hardy shrubs like boxwood, compact varieties of holly, or dense euonymus. They are naturally full at the bottom and can be maintained at a height of 4-6 feet, perfectly covering the eye-level sightline. This tiered planting turns a design problem into a beautiful and highly functional landscape feature.
This strategic layering is the ultimate fix for a see-through hedge, providing an immediate solution to the gap while creating a more resilient and visually dynamic garden boundary.
Bamboo vs. Trellis: Which Natural Screen Blocks Neighbors Faster?
When a traditional evergreen hedge seems too slow, homeowners often look to faster alternatives like bamboo or trellises with climbing vines. Both can create a natural screen much quicker than a shrub hedge, but they come with vastly different installation efforts and, more importantly, long-term maintenance commitments. The choice between them is a classic case of weighing speed against control.
A trellis covered in fast-growing annual vines (like morning glory or moonflower) offers the fastest possible privacy, often creating a dense screen in a single season. The trade-off is that it’s temporary; you have to replant every year. A trellis with perennial vines (like clematis or climbing hydrangea) is more permanent but takes a few years to establish full coverage.
Bamboo is notoriously fast, but it’s crucial to distinguish between the two main types. Clumping bamboo grows in a tight, contained cluster and expands slowly, making it a manageable (though still vigorous) choice for a screen. Running bamboo, on the other hand, is one of the most aggressive and invasive plants you can introduce to a garden. It sends out underground rhizomes that can travel dozens of feet, popping up in your lawn, your neighbor’s yard, and even under driveways. It requires a deep, robust, and expensive underground barrier for containment, and a failure in that barrier can lead to an ecological nightmare. This is the ultimate example of “maintenance debt.”
This matrix breaks down the total effort involved, highlighting the extreme risk associated with running bamboo.
| Factor | Clumping Bamboo | Running Bamboo | Trellis + Annual Vines | Trellis + Perennial Vines |
|---|---|---|---|---|
| Year 1 Privacy | Moderate | Rapid | Excellent (fast coverage) | Good |
| Initial Installation Effort | Low-Moderate | High (barrier required) | High (structure building) | High (structure building) |
| Long-Term Maintenance | Moderate (contained) | Very High (constant containment) | Low (replant annually) | Moderate (pruning) |
| Cost (5 years) | $300-800 | $800-2,000+ (barrier) | $400-700 (structure + seeds) | $500-900 |
| Lifespan | 20+ years | Indefinite (invasive) | 1 season (replant) | 10-20 years |
| Decommissioning Effort | Moderate | Extreme (professional removal) | Low (remove structure) | Moderate |
| Takeover Risk | Low (stays in clump) | Very High (spreads aggressively) | None | Low-Moderate |
For most homeowners seeking a balance of speed and control, a trellis with vines or a carefully selected clumping bamboo is a far safer and more strategic choice than the uncontrolled speed of running bamboo.
Key Takeaways
- A dense, healthy hedge depends more on strategic pruning and spacing than on the plant’s growth rate.
- Common hedge problems like bare bottoms and winter burn are preventable with proactive care and proper shaping.
- The best privacy solutions often involve layering different plants or combining a hedge with a fence to cover all sightlines.
The $500 Front Door Makeover That Selling Agents Swear By
A well-maintained hedge provides a powerful backdrop, but its impact is maximized when integrated into a cohesive front-of-house presentation. Real estate agents consistently emphasize that curb appeal creates the first impression that sets the tone for a potential buyer’s entire viewing. A simple, high-impact makeover focused on the front entrance can dramatically elevate a home’s perceived value, and your evergreen hedge plays a key supporting role.
The formula for this powerful first impression, often achievable for under $500, revolves around three key elements. The first is a fresh coat of paint on the front door in a bold yet welcoming color that contrasts with the home’s siding. Second is updating the small details that signal quality: a new, modern set of door hardware and an updated outdoor lighting fixture. These small metal elements can instantly modernize an entrance.
The final, crucial piece of this trio is framing the newly refreshed doorway with life. This is where your hedge strategy connects directly to curb appeal. Placing a matched pair of potted evergreens on either side of the door creates a strong, symmetrical, and inviting focal point. Choose plants with a strong vertical or spherical form, such as spiral arborvitae, boxwood spheres, or dwarf Alberta spruce, planted in high-quality, substantial planters. This brings the greenery from the property line right up to the doorstep.
For this to work, any existing foundation hedges near the entrance must be in pristine condition. A freshly painted door framed by beautifully shaped potted evergreens will have its effect completely undermined if the nearby hedges are browning, overgrown, or full of gaps. Ensuring these hedges are freshly trimmed and healthy is the final step that ties the entire visual story together, leveraging your investment in a privacy screen to create a truly polished and high-value first impression.
To truly maximize your home’s exterior appeal, start by assessing how your front entrance and existing hedges work together and identify the key elements you can upgrade for the most significant impact.