The key to a successful heritage renovation isn’t a battle between old and new, but a masterclass in translating the original design’s core principles into a modern context.
- Ignoring your home’s structural logic is the single fastest way to inflate costs and compromise its integrity.
- Original materials and features have inherent performance qualities (like breathability) that modern replacements often lack, leading to long-term damage if ignored.
Recommendation: Approach your renovation not as a cosmetic upgrade, but as a respectful dialogue with the building. Prioritize a thorough structural and material assessment before planning any aesthetic changes.
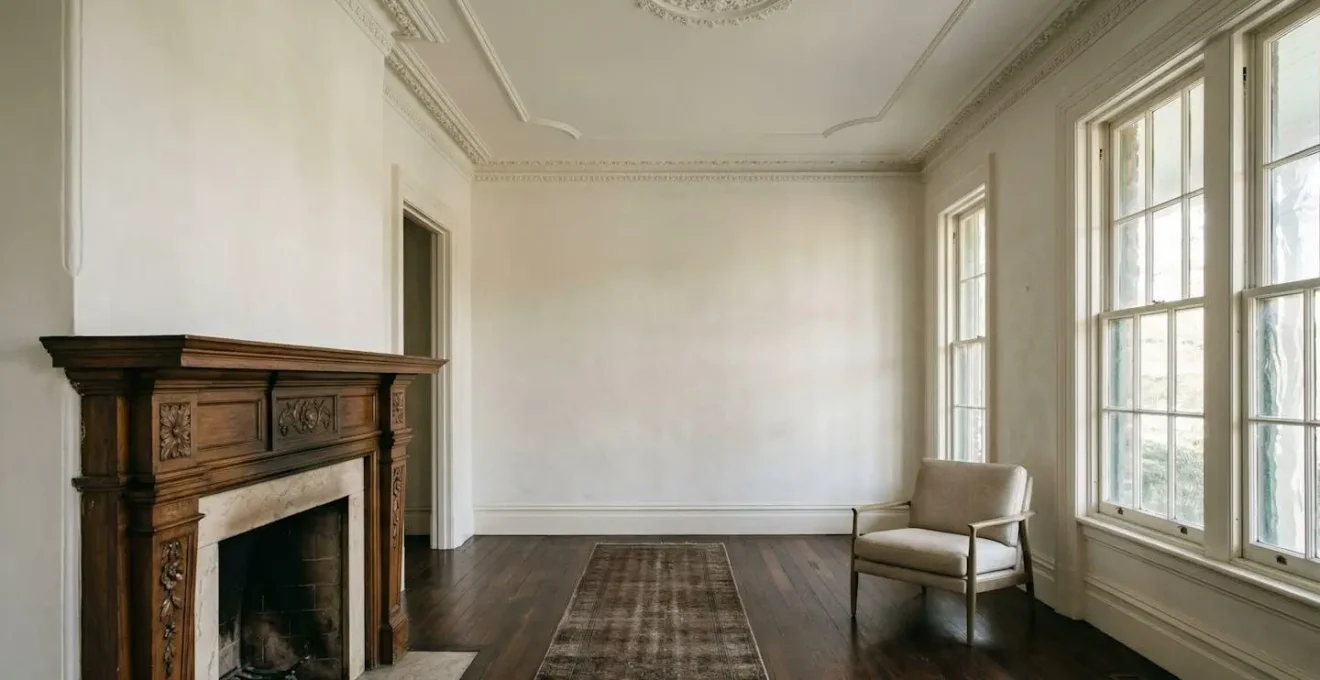
Owning a historic home is to be the custodian of a story. There’s a profound connection to the craftsmanship of a bygone era, visible in the intricate crown molding, the solid weight of the doors, and the unique patina of aged wood floors. Yet, the romanticism often clashes with the realities of modern life. You crave an open, light-filled kitchen, not a cramped, dark workspace. You need efficient heating and reliable electricity, not drafty windows and outdated wiring. This creates a paralyzing fear: How do you introduce modern comforts without erasing the very soul you fell in love with?
The common advice often feels like a set of generic rules: “preserve original features,” “mix old and new.” But these platitudes offer little guidance when you’re faced with a real-world dilemma. Should you sacrifice an original plaster wall for insulation? Is it a sin to replace drafty single-pane windows? The conversation often misses the most crucial point. The secret to a masterful renovation lies not in a simple checklist, but in understanding the fundamental principles that guided the original builders.
This guide offers a different perspective—an architect’s approach. We will move beyond the surface-level “what” and delve into the “why.” You will learn that the true character of your home is not just in its decorative elements, but in the intelligent dialogue between its structure, materials, and its relationship with light. By learning to “read” your home’s original design intent, you can make informed decisions that honor its history while seamlessly integrating the functionality and comfort of the 21st century. It’s not about preservation versus modernization; it’s about thoughtful integration.
To navigate this complex but rewarding journey, this article breaks down the core challenges into a series of focused, practical sections. From understanding the catastrophic cost of structural naivety to mastering the subtle art of lighting a Victorian hallway, the following chapters provide a blueprint for a renovation that is both beautiful and intelligent.
Summary: A Principled Approach to Historic Home Modernization
- The Structural Mistake That Can Collapse Your Renovation Budget
- How to Restore Original Crown Molding Covered by Layers of Paint?
- Matte or Gloss: Which Finish Suits Victorian Plasterwork Best?
- Why External Insulation Might Ruin Your Facade’s Resale Value
- In What Order Should You Renovate a Fixer-Upper to Avoid Redoing Work?
- Does Converting a Garage Add Value if You Lose Parking?
- Why Concrete Walls Need Velvet or Wool to Avoid the ‘Parking Garage’ Look
- How to Brighten a Narrow Victorian Foyer Without Removing Period Features?
The Structural Mistake That Can Collapse Your Renovation Budget
The most alluring part of a renovation is envisioning the final aesthetics—the new kitchen island, the elegant bathroom tiles. But the single most catastrophic mistake a historic homeowner can make is prioritizing these cosmetic dreams over the building’s structural reality. Ignoring, or failing to properly assess, your home’s foundation, load-bearing walls, and roof structure is not just a risk; it’s a guaranteed path to budget overruns. Problems that are hidden behind walls don’t disappear; they multiply. A small, unsupported change can cascade into major failures.
Think of it as structural honesty. Before you plan a single finish, you must understand the home’s skeleton. This requires a professional structural assessment. While the cost of a structural engineer might seem like an unnecessary expense, it’s a vital investment. This upfront analysis identifies sagging joists, compromised foundations, or undersized beams before they become project-derailing emergencies. Ignoring this step often leads to “change orders”—unplanned work discovered mid-renovation—which can be devastatingly expensive. In fact, for complex historic projects, change orders can account for 10-15% of the total construction cost.
The lesson is clear: your budget must first be allocated to ensuring the house is safe, stable, and sound. Only then can you begin to layer in the modern systems and beautiful finishes. Approaching the project with this structural-first mindset protects your investment, your safety, and ultimately, the long-term integrity of the historic building itself. It is the unglamorous but essential foundation of a successful renovation.
How to Restore Original Crown Molding Covered by Layers of Paint?
Over a century, successive layers of paint can act like a thick, lumpy shroud, obscuring the crisp details and delicate curves of original plaster or wood molding. What was once a sharp, shadow-defining element becomes a soft, rounded suggestion of its former self. Restoring it is not just a repair; it is an act of architectural excavation, revealing the craftsmanship hidden beneath. The goal is to remove the paint without damaging the delicate material underneath, a process that requires patience and the right technique.
The process is methodical. Aggressive sanding or heat guns can easily damage antique wood or brittle plaster. The preferred professional approach involves chemical strippers, which soften the paint for gentle removal. It’s crucial to work in a well-ventilated area and take all necessary safety precautions. The reward for this careful work is the return of sharp, clean lines that can once again play with light and shadow, restoring a significant part of the room’s intended architectural character.
Your Action Plan: Unveiling Hidden Details
- Test Area: First, test a chemical stripper on a small, inconspicuous area to assess its effectiveness and ensure it doesn’t harm the underlying wood or plaster.
- Careful Application: Using a natural-bristle brush, apply the paint stripper meticulously, ensuring it gets into every crease and nook. Follow the manufacturer’s recommended wait time, which can range from 30 minutes to several hours.
- Gentle Removal: Once the paint has softened, use a contour scraper or other specialized tools designed for detailed profiles to gently lift the paint away. Avoid gouging the surface.
- Address Stains (Optional): If the paint has left color stains in the wood grain and you plan to stain (not paint) the molding, apply a wood bleach to even out the tone.
- Neutralize and Dry: Clean the stripped area with a sponge and clean water to neutralize any remaining chemicals. Allow the molding to dry completely for several days before applying any new finish.
Matte or Gloss: Which Finish Suits Victorian Plasterwork Best?
The choice of paint finish seems like a minor detail, but on historic plasterwork, it has a profound impact on how the room feels and how its architectural features are perceived. The modern default is often a satin or semi-gloss finish, prized for its durability and washability. However, on the subtly undulating surfaces of hand-troweled plaster or ornate Victorian moldings, a high-sheen paint can be a disaster. It creates harsh, reflective hotspots that catch the light jarringly, highlighting every minor imperfection and flattening the perceived depth of the details.
The secret lies in understanding how light interacts with a surface. A gloss finish creates a specular reflection—like a mirror—while a matte finish creates a diffuse reflection, scattering light softly in all directions. For historic interiors, a diffused glow is almost always preferable. This is why traditional, breathable finishes like limewash are experiencing a resurgence in heritage renovations. As noted by experts in natural finishes, limewash offers a unique visual quality. Earthaus Plaster, in its guide, highlights this effect perfectly:
Limewash creates a soft, matte finish with subtle movement and texture that develops a unique patina over time, reflecting light uniquely with a diffused glow rather than a reflective sheen.
– Earthaus Plaster, Natural Limewash Paint & Wall Finishes guide
Choosing a flat or matte finish—or better yet, a traditional limewash—allows the shadows in the recesses of crown molding and ceiling roses to appear deeper and the raised elements to come forward gently. It honors the material’s texture and the artisan’s hand, creating a soft, sophisticated atmosphere that feels both authentic and calming. It prioritizes the sculptural quality of the architecture over the artificial sheen of a modern coating.
Why External Insulation Might Ruin Your Facade’s Resale Value
In the quest for energy efficiency, applying a thick layer of external insulation (known as EIFS or External Insulation Finishing Systems) can seem like a logical solution for a drafty old home. It promises a thermal blanket that wraps the building, cutting down heating bills. However, for a historic home with a character-defining facade—be it brick, stone, or decorative stucco—this approach can be an architectural and financial catastrophe. By covering the original material, you are not just hiding it; you are fundamentally and often irreversibly erasing the building’s primary aesthetic and historic value.
Beyond the visual destruction, there is a serious technical risk. Historic walls were designed to “breathe”—to allow moisture to pass through them and evaporate. Many modern, non-breathable insulation materials like polystyrene foam trap this moisture within the wall structure. This creates a perfect environment for dampness, mold growth, and the slow decay of the building’s very fabric. The wall remains cold and wet, leading to catastrophic long-term damage.
Case Study: The Dangers of Non-Breathable Insulation
As documented in cases of improper retrofitting, applying non-breathable external insulation to historic masonry can have severe consequences. A study of such applications shows that when moisture from inside the home migrates into the wall and cannot escape, it becomes trapped. According to an analysis by experts on insulating historic buildings, this trapped moisture leads to the decay of structural elements, including the rotting of wooden wall plates, lintels, and the ends of joists embedded in the wall. The solution is to use breathable insulation materials, like wood fiber boards, which allow for two-way moisture transfer and prevent this destructive interstitial condensation.
The far better approach is to work *with* the building’s original design. This means focusing on improving the performance of windows, insulating the roof and floors, and, if wall insulation is necessary, using breathable materials on the interior. This preserves the invaluable historic facade while still achieving significant gains in thermal comfort and efficiency, protecting both the character and the structural health of your home.
In What Order Should You Renovate a Fixer-Upper to Avoid Redoing Work?
The excitement of renovating a historic fixer-upper can quickly turn to frustration and financial pain if work is done in the wrong sequence. The golden rule is to work from the outside in, and from the top down, addressing the most fundamental systems before any cosmetic touches. Installing a beautiful new hardwood floor only to have it ruined by a plumbing leak or covered in dust from plaster demolition is a costly and demoralizing error. A strategic order of operations is not just efficient; it is the only way to protect your investment and sanity.
The process must begin with securing the building’s envelope and structure. This means addressing the roof, foundation, and any structural repairs first. Once the building is stable and watertight, you can move on to the internal “guts”—the electrical, plumbing, and HVAC systems. These are invasive jobs that often require opening up walls and floors. Only after these critical, messy, and foundational stages are complete should you even begin to think about finishes like plaster, paint, and flooring.
Your Renovation Roadmap: The Strategic Phased Approach
- Define Scope and Assess Structure: Begin with a clear plan. Establish exactly which areas will be renovated. Then, hire experienced structural engineers and architects to conduct a thorough inspection, identifying any weaknesses, damage, or foundational issues.
- Address Major Structural and Envelope Repairs: This is Phase One of construction. Fix the roof. Repair the foundation. Address any load-bearing concerns or compromised structural elements. Make the building watertight and stable before anything else.
- Update Essential Systems (The ‘Rough-in’): With the structure sound, proceed with the ‘rough-in’ for all essential systems. This involves replacing old plumbing, running new electrical wiring, and installing ductwork for a modern HVAC system. This work is done while walls and floors are still open.
- Insulate and Close Walls: Once systems are in place and inspected, you can install insulation (using breathable materials where appropriate) and then close up the walls with plaster or drywall. This is the stage where the new ‘rooms’ start to take shape.
- Complete Finishes (From Top to Bottom): This is the final and most visually rewarding phase. Work from the top of the house down. Install ceilings, paint walls, lay flooring, install cabinetry, and finally, add light fixtures, hardware, and trim. As one guide on the process from historic home renovation specialists puts it, this is the final layer of polish after the hard work is done.
Does Converting a Garage Add Value if You Lose Parking?
In many urban settings, converting a garage into an Accessory Dwelling Unit (ADU) or additional living space is a popular way to maximize square footage and potentially add significant value. However, in the context of a historic property, this decision is far more nuanced than a simple equation of square footage versus parking. The first consideration is the architectural character of the garage itself. Is it a modern, non-descript structure, or is it an original carriage house with its own historic merit? Converting a charming carriage house might detract from the property’s overall historic narrative and appeal, even if it adds livable space.
The second factor is the local context. In a dense historic neighborhood where on-street parking is scarce and highly valued, removing the only off-street parking space can be a significant detriment to resale value. A potential buyer might see the loss of a dedicated parking spot as a major inconvenience that outweighs the benefit of an extra bedroom or office. The perceived value is highly dependent on the specific needs and priorities of the target market in that area.
Ultimately, the decision requires a careful trade-off analysis. If the garage is architecturally insignificant and the property is located in an area with ample public transport and available parking, a conversion is more likely to yield a positive return. Conversely, if you are sacrificing a valuable, secure parking spot in a congested area or altering a historically significant outbuilding, the “added value” in square footage might be a net loss when it comes to the property’s overall desirability and market price. It’s a strategic choice that must be weighed against the specific character and constraints of the property and its neighborhood.
Key Takeaways
- Structure First, Aesthetics Last: The integrity and stability of the building’s core and envelope must be the first priority, preceding all system and finish work.
- Materials Must Breathe: Historic buildings are designed as breathable systems. Using modern, non-breathable materials for insulation or finishes can trap moisture and cause catastrophic decay.
- Light is a Design Tool: The choice of paint finish and lighting strategy is not merely decorative; it’s a way to sculpt space, enhance architectural details, and create atmosphere.
Why Concrete Walls Need Velvet or Wool to Avoid the ‘Parking Garage’ Look
The juxtaposition of raw, modern materials like exposed concrete with historic architecture can be a powerful design statement. It creates a dialogue between eras, highlighting the textures and honesty of both the old and the new. However, when done without a nuanced understanding of sensory balance, it can easily fail, leaving a space that feels cold, harsh, and acoustically unpleasant—much like a parking garage. The key to making this combination work lies in introducing soft, porous materials to counteract the hard, reflective nature of the concrete.
This is not just about aesthetics; it’s about physics and psychology. Hard surfaces reflect sound waves, creating echoes and a clinical, noisy environment. Soft, textural materials do the opposite: they absorb sound, creating a sense of calm and intimacy. As experts in architectural design note, this balance is fundamental to creating comfortable spaces.
Hard surfaces like concrete and glass bounce sound waves, creating harsh echoes, while soft, porous materials absorb them for acoustic comfort. The raw, cold texture of concrete is balanced and humanized by the visual and physical warmth of natural fibers, creating a richer sensory experience.
– Acoustic Design Principles, Historic Building Renovation Design Guidelines
Therefore, when introducing a concrete feature wall or polished concrete floors, you must strategically layer in materials that provide acoustic and visual warmth. Think heavy velvet curtains that pool on the floor, a plush wool area rug, or upholstered furniture with rich texture. These elements do more than just decorate; they perform a crucial function. They absorb sound, they offer a soft texture to contrast the concrete’s hardness, and they provide a visual warmth that makes the space feel inviting and humane. This deliberate material dialogue is what separates a sophisticated architectural intervention from a cold, unfinished room.
How to Brighten a Narrow Victorian Foyer Without Removing Period Features?
The archetypal Victorian foyer is often long, narrow, and notoriously dark, designed in an era before the obsession with open-plan, light-filled living. The knee-jerk modern reaction might be to tear down walls or widen doorways, but this would destroy the very character and transitional purpose of the space. The more intelligent and respectful solution is to work with the existing architecture and use light itself as a material to visually widen, brighten, and animate the foyer.
The key is a layered lighting strategy. A single, central overhead fixture, no matter how bright, will create harsh shadows and fail to illuminate the space evenly. Instead, a successful scheme combines multiple light sources at different heights, each with a specific job. This creates depth, highlights features, and provides a warm, welcoming glow. The goal is to wash walls with light, draw attention to beautiful details, and reflect light around the narrow space to create an illusion of greater width and brightness.
Your Action Plan: Layering Light in a Historic Foyer
- Ambient Layer: Start with a primary overhead light source. This could be a period-appropriate chandelier or a modern fixture that complements the home’s style. This provides the base level of general illumination.
- Task Layer: Add functional light where it’s needed. A slim lamp on a console table provides light for finding keys or sorting mail and adds a warm, welcoming pool of light at eye level.
- Accent Layer: This is where the magic happens. Use discreet floor-level uplighters to graze the walls and highlight the texture of original cornices, decorative tiles, or an ornate staircase. This technique draws the eye upward and creates a sense of drama and height.
- The Mirror Trick: Place a large, simple, frameless mirror on one of the long walls, ideally opposite a window or a light source. It will not only reflect light, effectively doubling its impact, but also create a powerful illusion of depth.
- Borrowed Light: If the foyer has an internal door leading to a brighter adjoining room, consider replacing its solid panels with reeded or frosted glass. This “borrows” light from the next room, brightening the foyer while still maintaining privacy.
By approaching your project with this principled mindset, your renovation becomes more than an upgrade; it becomes a thoughtful contribution to your home’s ongoing story. Begin this journey not by asking what you can change, but by first understanding what is timeless. A careful assessment of your home’s unique character and structural needs is the essential first step toward a modernization that feels both brilliant and right.