The secret to chic indoor rattan is not about adding accessories; it’s about elevating the material itself through an understanding of its quality, form, and context.
- Focus on material integrity—distinguishing high-quality, durable weaves from those that degrade quickly.
- Treat rattan as a sculptural element, complementing its form with sophisticated textures and lighting.
Recommendation: Shift your mindset from decorating a piece of rattan to integrating its natural elegance into your home’s core design story.
Rattan furniture has an undeniable charm, evoking sun-drenched verandas and relaxed, airy spaces. Yet, for many homeowners, bringing it indoors comes with a nagging fear: will it look less like a chic interior choice and more like misplaced patio furniture? The common advice—to toss on a few cushions or pair it with a plant—often feels like a superficial fix that fails to address the core issue. This approach can leave rattan feeling like a temporary, trendy visitor rather than a timeless, integrated part of your home.
The hesitation is understandable. We’ve all seen wicker that looks flimsy, dated, or simply too casual for a polished living room or bedroom. But what if the solution wasn’t about masking rattan’s inherent nature, but about celebrating it? The true art of styling rattan indoors lies in a deeper appreciation for its qualities: its structural form, its textural potential, and its material integrity. It’s about making deliberate, informed choices that elevate it from a simple “boho” accent to a statement of sophisticated, natural elegance.
This guide moves beyond the platitudes. We will explore the principles that distinguish exquisite indoor rattan from its outdoor counterparts. By understanding the nuances of material, maintenance, comfort, and integration, you will learn not just to style rattan, but to curate it, ensuring it becomes a sophisticated and enduring feature of your interior design narrative.
To guide you through this elevation process, this article is structured to answer the most critical questions about selecting, maintaining, and styling rattan and other woven decor with elegance and confidence. Explore the sections below to master each aspect.
Contents: Elevating Rattan from Patio to Parlor
- Synthetic vs. Natural Rattan: A Matter of Sunlight and Longevity
- Reviving Vintage Charm: How to Expertly Fix a Broken Rattan Strand
- The Art of Comfort: Transforming Rattan Seating with Elevated Cushioning
- The Hidden Danger: Preventing Mold on Rattan in Humid Spaces
- A Painter’s Guide: The Best Method for Updating Old Wicker
- The Telltale Signs: Why Cheap Wicker Unravels and How to Spot Quality
- Curated Greenery: Pairing Low-Light Plants with a Minimalist Aesthetic
- Beyond Furniture: How to Securely Hang Heavy Macramé Art
Synthetic vs. Natural Rattan: A Matter of Sunlight and Longevity
The first step in elevating rattan is understanding its fundamental nature, or its material integrity. The choice between natural and synthetic rattan is not merely aesthetic; it’s a crucial decision that impacts longevity, especially in sun-filled rooms. Natural rattan, with its organic warmth, is beautiful but vulnerable. Without protection, its fibers can dry out, become brittle, and fade in a matter of months when exposed to direct UV rays. This degradation is often why it gets relegated to shaded porches.
Synthetic PE (polyethylene) rattan, on the other hand, is engineered for resilience. While early versions could look plasticky and cheap, modern high-quality synthetics masterfully replicate the look and feel of natural fibers while incorporating UV inhibitors. According to industry durability testing, premium PE rattan can endure over 2,000 hours of UV exposure without significant fading or structural failure. This makes it a far more practical choice for a bright living room or sunroom where you want the rattan look without the constant worry of sun damage.
The difference in lifespan is stark. An analysis of UV degradation shows that while natural rattan may begin to show wear quickly, a high-quality synthetic piece can last 5-7 years even with sun exposure, maintaining its color and form. Choosing the right material for the right location is the first principle of sophisticated integration, ensuring your investment looks intentional and elegant for years to come.
Reviving Vintage Charm: How to Expertly Fix a Broken Rattan Strand
Part of rattan’s appeal lies in its history and the character of vintage finds, like an iconic peacock chair. However, a broken or unraveling strand can quickly detract from its sculptural beauty. Knowing how to perform a seamless repair not only restores the piece’s aesthetic but also reinforces the idea of rattan as a durable, long-term possession rather than a disposable trend. This act of maintenance is a nod to true craftsmanship and sustainability.
Repairing a broken strand is a meticulous process that, when done correctly, is nearly invisible. The key is in the preparation of the new material and the precision of the weave. The goal is to integrate the new strand so it follows the original pattern perfectly, respecting the chair’s original design. This is a far cry from a quick fix with glue, which often looks clumsy and can fail over time.
For a professional-level repair on a beloved piece, follow this established method:
- Prepare the Area: Carefully cut away the broken strand, leaving about half an inch of the old strand on either side tucked into the weave. This will serve as an anchor point.
- Cut the Replacement: Measure and cut a new strand of rattan reed, ensuring it’s slightly longer than the gap you need to fill.
- Soak to Soften: Submerge the new strand in lukewarm water for approximately 30 minutes. This makes it pliable and easy to weave without cracking.
- Secure the Start: Apply a small dab of waterproof super glue to the end of the old, tucked-in strand and press the end of your new, damp strand onto it.
- Weave the Strand: Carefully weave the new strand into the furniture, following the existing pattern of overs and unders. Pull it taut as you go.
- Finish and Dry: Secure the other end with another dab of glue and trim any excess. Allow the glue to dry completely, typically for at least 30 minutes, before the chair is used.
This careful restoration honors the structural form of the piece, ensuring its elegance remains intact for future generations to admire. It transforms a simple chair into a story of preservation.
The Art of Comfort: Transforming Rattan Seating with Elevated Cushioning
One of the most common complaints about rattan chairs is their comfort—or lack thereof. The rigid, woven surface can feel uninviting. The typical response is to add a generic, puffy cushion, but this often hides the beautiful craftsmanship of the chair and can reinforce the “patio” look. A more sophisticated approach treats cushioning not as a cover-up, but as an opportunity for a rich textural dialogue with the rattan itself.
The secret is to choose cushions that complement, rather than conceal, the chair’s form. Opt for a sleek seat pad instead of a bulky, overstuffed pillow. For the back, consider a lumbar pillow that provides support while leaving the majority of the chair’s elegant backrest visible. This respects the piece’s sculptural quality. The choice of fabric is paramount. Juxtapose the hard, natural texture of rattan with materials that exude indoor luxury: think rich velvet, soft bouclé, or refined linen in a color palette that ties into your room’s decor.
As this detailed view shows, the quality of a cushion lies in its construction. A high-density foam core provides firm support, while a softer wrap adds a layer of plushness. The outer fabric should feel as luxurious as it looks, turning a simple chair into an inviting and multisensory experience. This thoughtful pairing elevates both the comfort and the aesthetic, making the chair a destination for relaxation, not just an object to look at.
The Hidden Danger: Preventing Mold on Rattan in Humid Spaces
Introducing natural materials like rattan into a bathroom or a humid climate can create a serene, spa-like atmosphere. However, this environment poses a significant risk: mold. Natural rattan is a porous material, and constant exposure to moisture and poor air circulation creates the perfect breeding ground for mildew, which not only damages the furniture but can also impact indoor air quality. The key mistake is assuming rattan can handle humidity without any preparation.
Proactive care is essential for maintaining the beauty and integrity of your rattan decor in these spaces. The first line of defense is controlling the environment. Experts advise that you should maintain indoor humidity levels between 40-60% through the use of a dehumidifier or proper ventilation. Wiping down your rattan pieces with a dry cloth after a steamy shower also helps remove surface moisture before it can be absorbed.
For maximum protection, a pre-treatment with a sealant is a non-negotiable step. This creates a barrier that repels moisture. Follow this sealing process before placing any natural rattan piece in a bathroom:
- Clean and Dry: Ensure the piece is completely free of dust and is thoroughly dry.
- Select a Sealant: Choose a moisture-resistant sealant appropriate for natural fibers, such as marine varnish, a clear polyurethane, or even boiled linseed oil for a more natural finish.
- Apply the First Coat: Using a soft cloth or brush, apply a thin, even coat of the sealant. Work the product into all the crevices of the weave.
- Allow to Cure: Let the sealant dry completely, following the manufacturer’s specific instructions. This can take several hours.
- Apply a Second Coat: A second coat ensures maximum coverage and creates a robust moisture barrier.
- Maintain Protection: This protective layer should be reapplied every 6 to 12 months to maintain its effectiveness against humidity.
By taking these preventative measures, you can confidently use rattan to bring organic texture to any room, without compromising its longevity or your home’s health.
A Painter’s Guide: The Best Method for Updating Old Wicker
A coat of paint can be a transformative tool for updating old or dated wicker, instantly shifting its aesthetic from tired to chic. However, the method of application is what separates a professional, factory-like finish from a messy, amateurish job. While brushing seems straightforward, it often leads to drips, uneven coverage, and clogged weaves, highlighting imperfections rather than hiding them. For the intricate surface of rattan or wicker, spray painting is unequivocally the superior method.
The key to a flawless spray-painted finish lies in consistent application and control, which creates a thin, even layer that respects the texture of the weave. A brush simply cannot achieve this level of uniformity. For an even more elevated result, preparation is everything. Before any paint is applied, the piece must be impeccably clean and properly primed to ensure the topcoat adheres without chipping or flaking over time.
Action Plan: Achieving a No-Chip Wicker Paint Finish
- Deep Clean the Surface: Use a solution of mild detergent and warm water with an old toothbrush to gently scrub all crevices and remove dirt and oils.
- Rinse and Dry Completely: Wipe the surface with a clean, damp cloth to remove all soap residue, then let the furniture dry for at least 24-48 hours.
- Scuff-Sand for Adhesion: Lightly sand the entire piece with very fine-grit sandpaper (220-grit) to smooth rough spots and create a micro-texture for the primer to grip onto.
- Remove All Dust: Use a leaf blower, compressed air, or a vacuum with a brush attachment to remove every particle of sanding dust from the weave.
- Prime for Durability: Apply a high-quality, shellac-based spray primer. This type of primer is excellent at blocking stains and ensures the final color is rich and durable.
Case Study: The Hanging Chair Restoration
A project to restore a vintage rattan hanging chair demonstrated the power of spray application. As documented by the lifestyle blog Most Lovely Things, using Rust-Oleum 2X Ultracover Paint + Primer at around $6.48 a can provided exceptional coverage on the complex weave. The project required 2.5 cans and, by using a makeshift booth from plastic drop cloths to contain overspray, achieved a perfectly smooth, professional finish that would have been impossible with a brush, truly elevating the piece.
The Telltale Signs: Why Cheap Wicker Unravels and How to Spot Quality
The single greatest factor that makes rattan look like “patio furniture” is poor quality. Cheaply made pieces, often constructed with thin materials, loose weaves, and shoddy assembly, are destined to fail. They unravel, wobble, and fade, reinforcing the perception of rattan as a disposable, low-end material. Understanding how to identify quality is perhaps the most important skill in elevating rattan for indoor use.
True material integrity is visible if you know where to look. High-quality rattan furniture is characterized by a tight, consistent weave without gaps or loose strands. The ends of the reeds should be neatly tucked and woven back into the frame, not simply cut and secured with visible staples or glue, which are sure signs of mass-produced, low-cost construction. The piece should also feel substantial and stable. If it wobbles or feels feather-light, it likely has a weak frame made of inferior materials like rust-prone steel instead of durable, powder-coated aluminum or solid hardwood.
Before you invest in a piece, perform a quick quality inspection. This brief audit will empower you to distinguish a future heirloom from something that will unravel after one season.
- Check the Weave Ends: Look underneath and behind the piece. Are the ends of the strands tucked in and woven, or are they held with glue and staples?
- Assess Weight and Stability: Give the piece a gentle shake. Does it feel solid, or does it wobble? Quality furniture has a reassuring heft.
- Inspect the Finish: The color and finish should be even and smooth across the entire piece, without blotches or rough patches.
- Examine Weave Tightness: The strands should be pulled taut and tightly woven. Large gaps between strands are a red flag for poor craftsmanship.
- Verify the Frame: If possible, check the frame material. Powder-coated aluminum is the gold standard for longevity and resistance to rust, even indoors.
By learning to recognize these signs of quality, you shift from being a passive consumer to a discerning curator, selecting pieces with the inherent elegance and durability worthy of a place in your home.
Curated Greenery: Pairing Low-Light Plants with a Minimalist Aesthetic
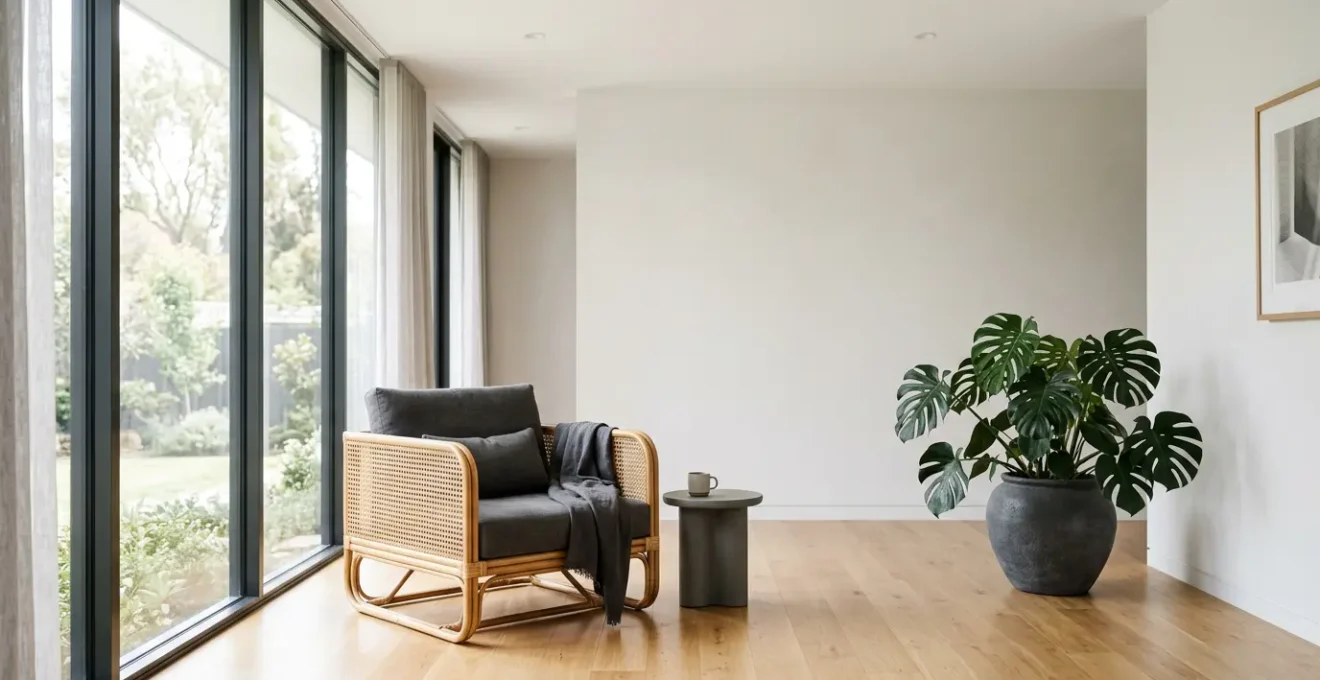
The pairing of plants and rattan is classic, but it can easily veer into a cluttered, “jungle-boho” aesthetic. For a more sophisticated and minimalist approach, the key is curation. Instead of adding many small plants, select one or two statement plants with strong architectural forms that complement the rattan’s texture without overwhelming it. This creates a deliberate, artful composition rather than a random collection of greenery.
In spaces with less natural light, the choice of plant is even more critical. Low-light tolerant plants are essential, and many happen to possess the clean lines perfect for a minimalist look. Consider the Zamioculcas zamiifolia (ZZ Plant), with its deep green, glossy leaves and upright growth, or the Sansevieria (Snake Plant), known for its striking, sword-like vertical foliage. These plants provide a beautiful contrast in form and color to the soft, woven texture of a natural rattan chair.
The planter is as important as the plant itself. To maintain a minimalist and chic aesthetic, choose simple, brandless planters made of matte ceramic, concrete, or metal in neutral tones like charcoal, white, or terracotta. As the FancyHouse Design Editorial Team notes in their guide, this thoughtful combination brings a sense of life to the space. In an article on styling with rattan, they state:
Plants like fiddle leaf figs, succulents, and ferns can bring a sense of calm and vitality to the space. They also help in purifying the air and adding a touch of greenery, which complements the natural textures of rattan and wicker furniture.
– FancyHouse Design Editorial Team, Supremely Stylish Living Room Ideas with Rattan Furniture
This principle of sophisticated integration—pairing the organic weave of rattan with the living sculpture of a well-chosen plant—creates a balanced and serene interior vignette.
Key Takeaways
- True rattan style comes from understanding its material integrity, not just adding accessories.
- Quality matters: learn to spot tight weaves and solid frames to avoid the “cheap” look.
- Use cushions, plants, and paint as tools for sophisticated integration, creating a textural dialogue rather than masking the material.
Beyond Furniture: How to Securely Hang Heavy Macramé Art
The same principles of integrating natural textures apply to other woven decor, such as large-scale macramé wall art. These pieces can add tremendous warmth and texture, but their weight can be a challenge. A common mistake is to hang them from a simple nail, which is unsafe for heavy art and can cause significant damage to drywall. Securely hanging a heavy piece shows a commitment to doing things right, ensuring the art is a safe and permanent feature of your design.
The method you choose depends on the weight of the piece and your wall structure. For any item over 5 pounds, a stud is always the best anchor. Use a stud finder to locate the vertical wood beams behind your drywall. Driving a screw or heavy-duty hook directly into a stud provides the most secure hold possible. However, studs are not always located exactly where you want to hang your art.
In cases where no stud is available, you must use a drywall anchor. Do not rely on small plastic plugs. For heavy pieces, you need something more robust:
- Toggle Bolts: These are among the strongest anchors. You drill a hole, fold the spring-loaded “wings” of the bolt, and push it through. The wings open up behind the drywall, creating a very secure brace against which you can tighten the bolt.
- Screw-In Anchors: For moderately heavy pieces (15-40 pounds), large, self-drilling threaded anchors can be a good option. They screw directly into the drywall and provide much better holding power than traditional nails or small screws.
- Distributing Weight: If the macramé hangs from a long dowel, use two anchor points toward either end of the dowel. This distributes the weight evenly and prevents the piece from sagging or putting too much stress on a single point.
By using the correct hardware, you can hang even the most substantial woven art with confidence, ensuring it becomes a stunning and safely integrated focal point in your room.
By moving beyond surface-level styling and embracing a deeper understanding of material, form, and quality, you can transform rattan from a casual accent into a cornerstone of a chic, timeless interior. The next logical step is to assess your own space and identify where these principles can be applied. Start by evaluating a single piece of furniture or an area of your home and envision how you can elevate it with these strategies.